We’re repairing Arcade1up Infinity Table PCBS for customers all over the US & Canada! To save massive on shipping, you’ll send us only your motherboard. Follow the simple disassembly steps on this page to get it ready to send!
Tools Required: Only a Philips head screwdriver. That’s the one shaped like an X
Click the links below to jump to each section.
- Disassemble Your Arcade1up Infinity Table & remove the motherboard PCB
- Package into a bubble wrap mailer
- Mail it to us! (U.S customers) (Canadian Customers)
- Send payment (U.S Customers) (Canadian Customers)
- Reassemble your Arcade1up Infinity table
If your Arcade1up Infinity Table doesn’t do anything when you press the power switch, follow these instructions to mail it to us. BUT if you’re still seeing a light on the power button but the screen won’t turn on, it might be a different issue! Call us @ 1-866-214-7933 & press 2 for service and we’ll see if we can help you.
Arcade1up Infinity Table Disassembly
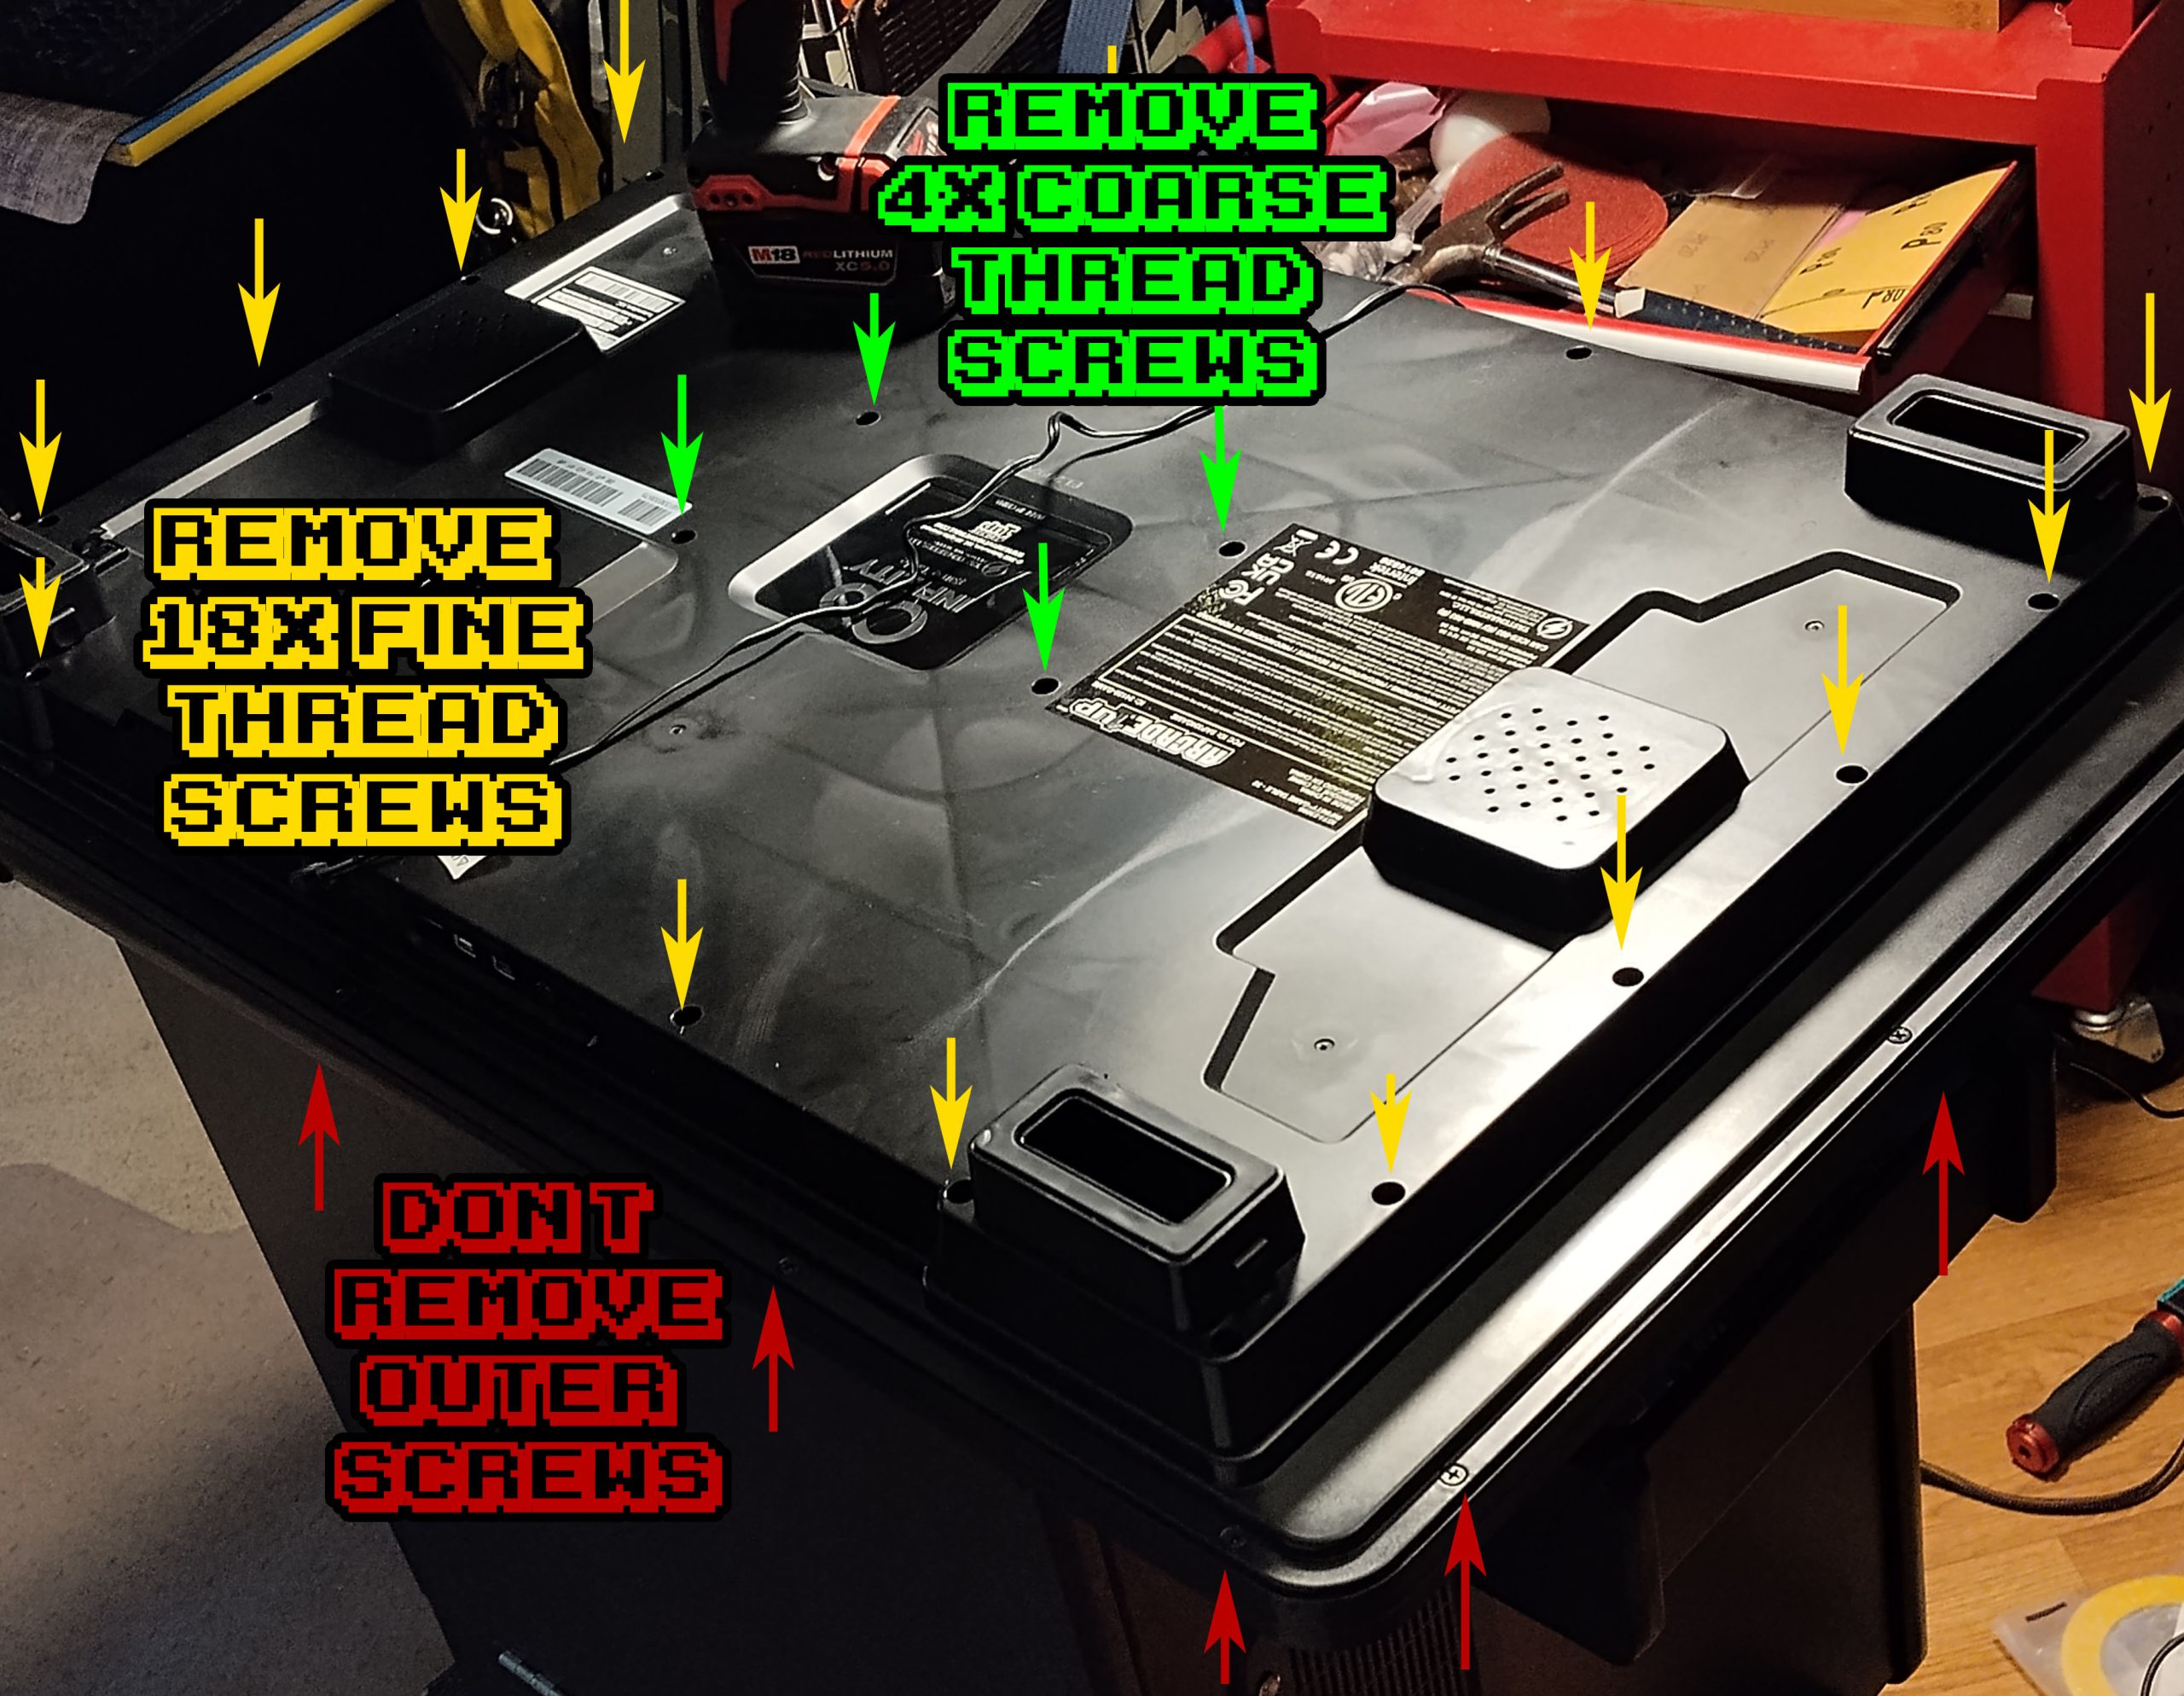
- Remove the 18 (or so) outside screws with an ordinary Philips head screwdriver. Set these aside.
- Remove the 4 inside screws. These are a different type of screw, so keep them separate.
- Gently remove the back cover.
- Unscrew the motherboard cover

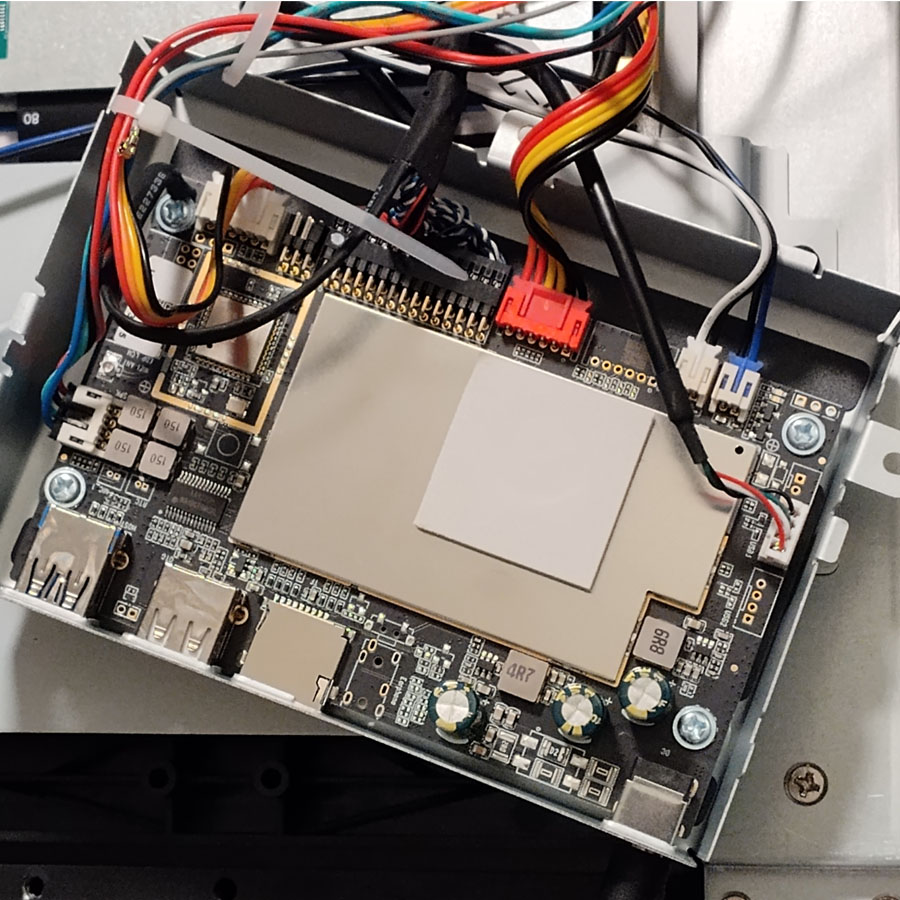
- Remove the four screws holding the motherboard in. One of the screws has a “ground cable” attached. Take note of that so you can put it back the same way when you get your PCB back from us!

- Now carefully remove all the other plugs from the motherboard PCB. Each one is keyed so that when you put them back you won’t make a mistake. But you can reference this page when you reassemble just to be double sure.
- One of the cables is a little tricky! It probably already popped out when you took the Infinity Table apart. Here’s pics of what it looks like and where it goes.
This tiny plug connects your infinity table to the wifi antennae, so if it’s not plugged back in, internet won’t work anymore. Be careful with it! These can break easily.
-
- That’s it! Your ready to ship it to us!


Infinity Table PCB Packaging Instructions
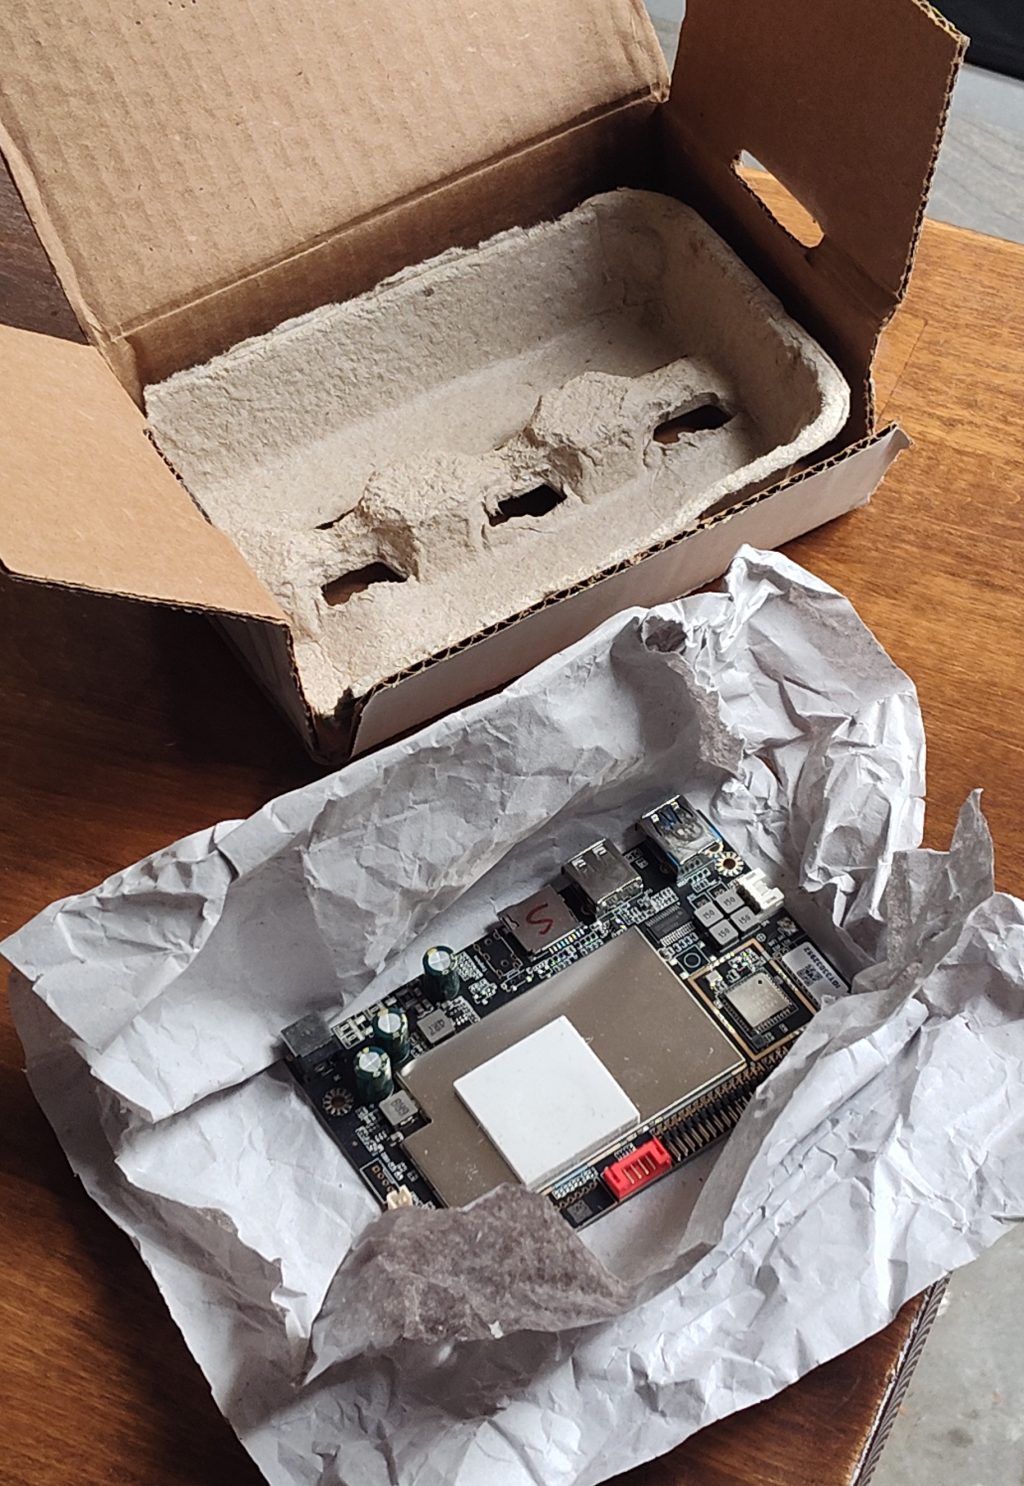
- Mail it in a nice cushy bubble mailer or box to protect it! Half an egg carton makes good packaging
- Put your full name and address in the top left corner so we know where to send it once it’s fixed.
(USA Customers) Mail it!
We have a US mailbox in Blaine, WA. Mailing it here instead of our Canadian HQ saves a lot of paperwork headache for both of us. We would have to work with you to produce a commercial invoice showing that it’s a “temporary import.” And we’d both be charged brokerage fees. So we decided it’s simplest for everyone to set up a US mailbox.
Send it via USPS (or another service if you prefer) to:
Arcade Time Machine
c/o Trevor van Hemert
1685 H Street #51650
Blaine, WA 98230
For our US customers, we repair these for only 100$ plus 20$ for the return shipping. ($120 USD total)
US Customers click here to pay via Paypal or Credit Card
(Canadian Customers) Mail it!
Send it via Canada Post (or another service if you prefer) to:
Arcade Time Machine
c/o Trevor van Hemert
#104 – 6198 Kathleen Ave
Burnaby, BC V5H 2S7
For our Canadian Customers, we have to charge GST & PST. So we’ll give you a bit of break on the price. We repair these for only $130 CAD plus $15.60 (tax) plus $25 return shipping ($170.60 CAD total)
We prefer an etransfer to pay@arcadetimemachine.com , with your full name in the memo field. But you can also pay by Paypal or Credit Card.
Reassemble Your Infinity Table!
After 2 weeks or less, you’ll have your PCB back!
I’ll add more to this section later as I better understand any difficulties our customers are having in reassembly. For now, just follow the disassembly instructions in reverse order.

Good as new! 🙂